 Pin It
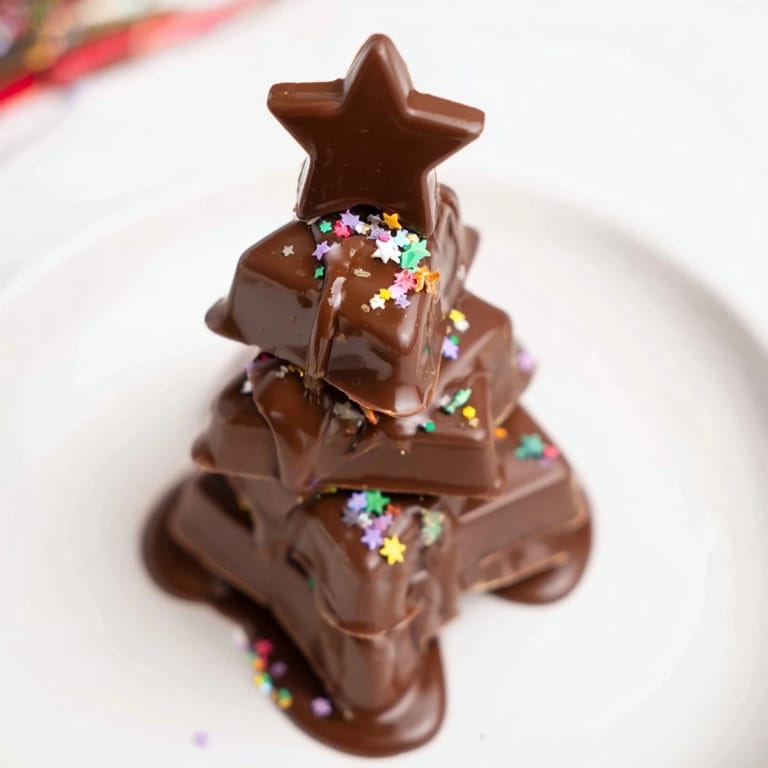
 My daughter spotted a Kinder bar at the grocery store and asked if we could turn them into Christmas trees. I laughed at first—seemed too simple—but then I remembered how the best holiday projects aren't about complexity, they're about creating something together. Within minutes, we were stacking chocolate bars like building blocks and drizzling them with melted chocolate. Now, these little edible trees are our favorite December shortcut dessert.
There's something about watching someone's face light up when they realize you made something beautiful they can eat. Last year, my nephew bit into one of these trees and got chocolate all over his nose before declaring it the best part of Christmas dinner. That's when I knew this recipe had crossed from fun project into genuine tradition.
Ingredients
- 24 mini Kinder chocolate bars: The foundation of everything—they stack surprisingly well and taste like nostalgia in wrapper form. If Kinders aren't available, any similar-sized chocolate bar works, though the toy element adds magic.
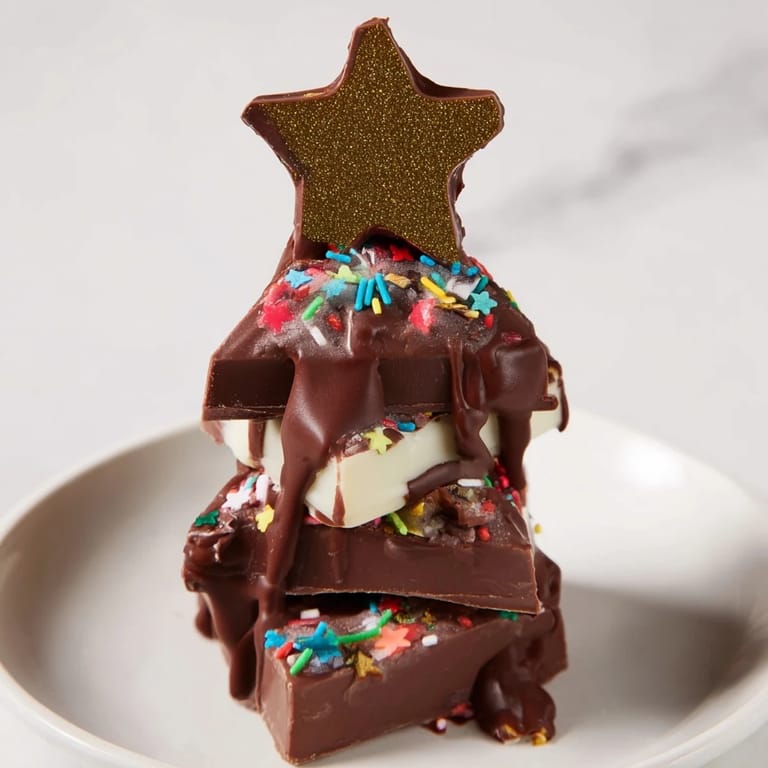
- 150 g dark or milk chocolate, chopped: This is your decorative glue and festive drape. Dark chocolate reads more elegant, but milk chocolate appeals to younger taste testers.
- 1 tsp coconut oil: Just enough to make the chocolate flow like silk when you drizzle. Skip it if you prefer thicker chocolate that clings more dramatically to the bars.
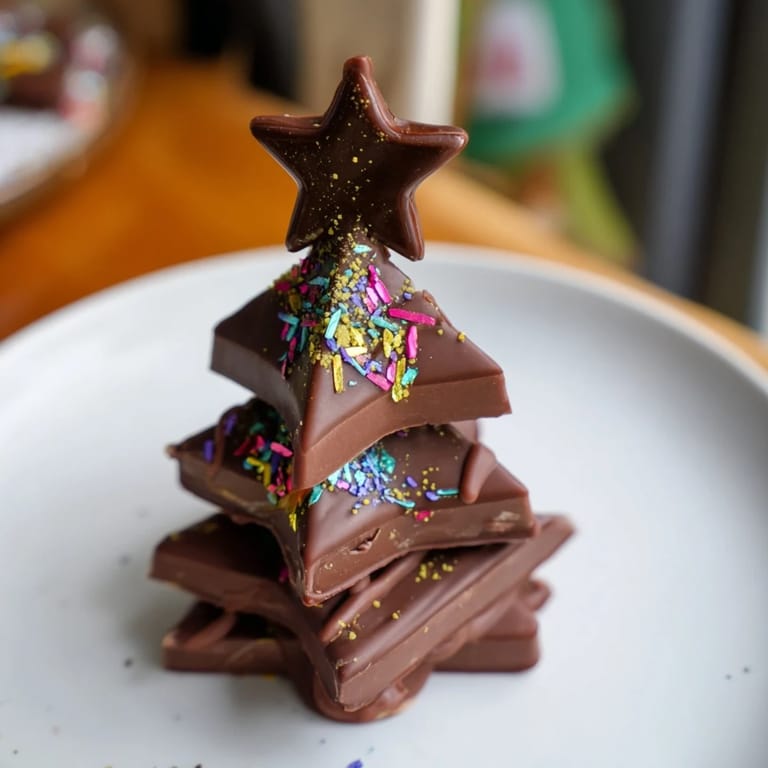
- 3 tbsp festive sprinkles or edible glitter: The moment when a stacked bar becomes a celebration. Go wild with colors or keep it elegant—both versions disappear equally fast.
- 8 mini chocolate stars or candy stars: The tree topper that makes everything official. Without this final touch, they're chocolate stacks; with it, they're Christmas trees.
Tired of Takeout? 🥡
Get 10 meals you can make faster than delivery arrives. Seriously.
One email. No spam. Unsubscribe anytime.
Instructions
- Set up your workspace:
- Line a tray with parchment paper so nothing sticks. This is where your trees will wait while the chocolate hardens—a simple step that saves frustration later.
- Unwrap and stack your trees:
- For each tree, place one whole Kinder bar as your base, break another in half and overlap them to form a triangle, then add another bar on top for height. Arrange them how they feel right—asymmetry looks more natural than perfect geometry.
- Space them out:
- Leave room between each tree on the tray so drizzles don't merge and they can chill independently.
- Melt your chocolate:
- In a heatproof bowl over simmering water or in 20-second microwave bursts, melt the chocolate with coconut oil until it's smooth and glossy. Watch it closely—chocolate betrays inattention quickly.
- Drizzle generously:
- Using a spoon or piping bag, pour chocolate over each stacked tree to mimic branching. The messier and more organic it looks, the more festive it feels.
- Decorate immediately:
- Before the chocolate sets, scatter sprinkles across each tree and crown it with a star. Timing matters here—wait too long and the chocolate hardens too much for toppings to stick.
- Chill and serve:
- Refrigerate for 10 to 15 minutes until everything is set, then serve chilled or at room temperature. They'll hold their shape for days if kept cool.
 Pin It
 The magic moment comes when someone realizes these aren't store-bought decorations—they're homemade. The bars taste familiar and comforting, but the chocolate drizzle and star topper transform them into something that feels special.
Why Kinder Bars Are Perfect for This
Kinder bars are built for stacking—they're thick enough to support weight but small enough to handle easily. Their slight roundness actually helps them nestle together naturally without fussy positioning. Beyond structure, there's something nostalgic about unwrapping them; the chocolate tastes like childhood holidays, which makes these trees feel more meaningful than a from-scratch recipe ever could.
Flavor Combinations That Work
While dark chocolate drizzle over milk chocolate bars creates a sophisticated look, you can swap things around based on mood. Milk chocolate over dark bars reads richer. White chocolate drizzle makes them look snow-covered and delicate. The bars themselves are non-negotiable—it's the outer chocolate coating that adapts to your vision.
Making These Kid-Friendly
Kids thrive with this recipe because every step feels like play rather than cooking. They can unwrap bars, build stacks, choose decorations, and drizzle chocolate under supervision. The outcome is always impressive, which means they remember the pride longer than the effort. When children help make the dessert, they eat it with more enthusiasm—proven science, probably.
- Assign roles: one person unwraps, another stacks, a third decorates while one supervises the melting chocolate.
- Let decorations be wild—uneven sprinkles and tilted stars are features, not bugs.
- Save a few unwrapped bars for snacking during the process; chocolate disappearance is part of the tradition.
 Pin It
 These trees prove that festive doesn't require hours of work or advanced baking skills—just chocolate bars, creativity, and fifteen minutes. They taste even better knowing you made them yourself.
Questions & Answers
- → What types of chocolate can be used for the drizzle?
You can use dark, milk, or white chocolate for the drizzle, depending on your preference. Adding a bit of coconut oil helps create a smooth melt.
- → Can other chocolate bars be substituted for Kinder bars?
Yes, any mini chocolate bars with a similar size and shape can be used to form the stacked trees.
- → How do I ensure the chocolate drizzle sets properly?
After drizzling, chill the assembled trees in the refrigerator for 10-15 minutes to allow the chocolate to firm up.
- → Are these treats suitable for kids to help make?
Absolutely—kids can assist with stacking the bars and adding sprinkles and candy stars for decoration.
- → What is the best way to store these stacked chocolate treats?
Store them in an airtight container in a cool place, such as the refrigerator, to keep them fresh for up to one week.