 Pin It
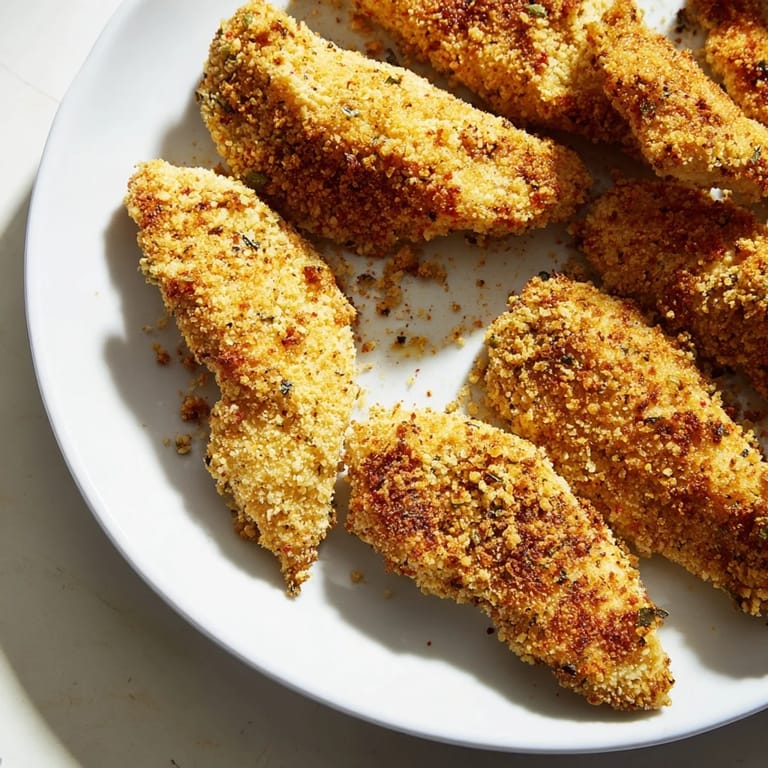
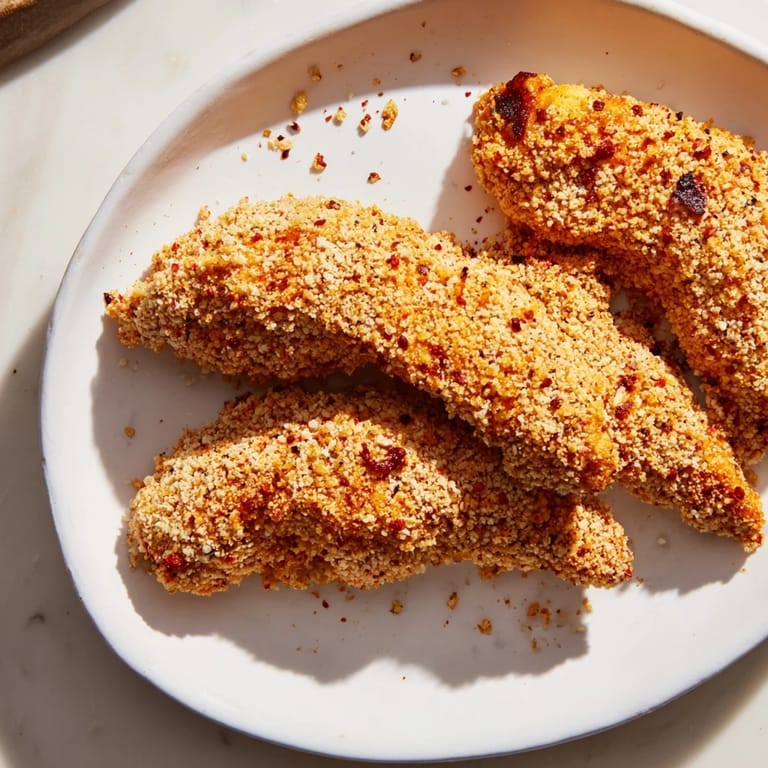
 There's something magical about the sound of chicken hitting hot air—that immediate sizzle and pop that promises crispiness. I discovered these air-fried tenders by accident one weeknight when I was determined to recreate that golden-crust texture my kids remembered from a favorite takeout place, but without the guilt. What started as an experiment with my newer kitchen gadget turned into our go-to dinner that somehow feels both indulgent and wholesome at the same time.
My mom tasted these once and immediately asked if I'd bought them from somewhere fancy, which made me laugh because I'd literally just dipped and sprayed them twenty minutes earlier. That moment of her surprise made me realize how often we assume homemade has to be complicated or time-consuming to be impressive. Now whenever I serve them, I watch people's faces as they bite through that crust and find juicy, tender chicken underneath—it never gets old.
Ingredients
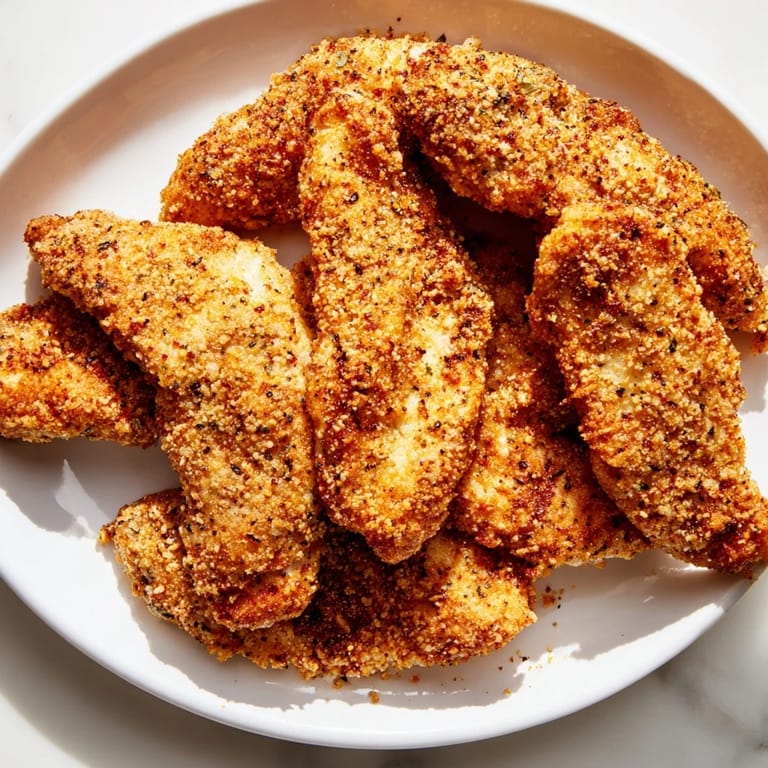
- Chicken tenders or breast strips (500 g): Pat them completely dry before coating—any moisture is the enemy of crispiness, and this step takes thirty seconds but changes everything.
- Whole-wheat breadcrumbs (75 g): They toast to a deeper color than white breadcrumbs and add a subtle nuttiness that regular breading can't match.
- Parmesan cheese (30 g): This isn't just flavor—it helps the coating brown faster and crisps up beautifully in the air fryer's heat.
- Smoked paprika (1 tsp): Skip the regular stuff; the smoky warmth adds depth that makes people ask what your secret ingredient is.
- Garlic and onion powder (1/2 tsp each): They work together to create savory undertones without any raw powder taste that can happen if you overseasoned.
- Oregano (1/2 tsp): Dried oregano brings an unexpected herbal note that separates these from basic breaded chicken.
- Salt and pepper (1/2 tsp and 1/4 tsp): Toast your black pepper briefly in a dry pan before grinding if you want it to sing—the warmth releases oils that make a real difference.
- Eggs and milk (2 large eggs plus 2 tbsp): The milk keeps the egg wash from being too thick, which helps the breadcrumbs adhere without clumping.
- Olive oil spray: This is what gets you the golden-brown exterior; don't skip it thinking air frying needs no oil.
Tired of Takeout? 🥡
Get 10 meals you can make faster than delivery arrives. Seriously.
One email. No spam. Unsubscribe anytime.
Instructions
- Heat and prep your workspace:
- Set your air fryer to 200°C and let it preheat for the full five minutes while you pat your chicken completely dry with paper towels. This waiting period is your friend—a properly preheated air fryer makes all the difference between golden and pale.
- Build your breading station:
- Whisk eggs and milk in one shallow bowl until completely combined, then mix all your dry ingredients in a second bowl, making sure the spices are evenly distributed. Take a moment to smell that mixture—if it doesn't make you hungry, adjust your seasoning now before you coat anything.
- Coat with intention:
- Work with one piece at a time: dip it into the egg, let excess drip back into the bowl for a second or two, then roll it through the breadcrumb mixture while gently pressing so the coating actually sticks. Think of it like giving the chicken a little hug with the breading rather than just dunking it.
- Arrange and spray:
- Lay your coated tenders in a single layer in the basket—they should touch but not overlap. Spray both sides lightly with olive oil; this is the secret to that restaurant-quality crunch you're after.
- Air fry and turn:
- Set the timer for five to six minutes, then open and flip each piece using tongs. This halfway turn ensures even browning and prevents any pale spots on the bottom.
- Finish strong:
- Return to the air fryer for another five to six minutes until the exterior is golden brown and a meat thermometer reads 75°C at the thickest part. If you're nervous, go for the lower end of the time range on your first batch—you can always air fry a minute longer, but you can't undo overdone chicken.
 Pin It
 One Sunday I made a double batch of these because my kids' friend was coming over, and something shifted in that kitchen when all three of them stood at the counter fighting over the last tender still warm from the air fryer. It stopped being about nutrition or convenience and became about creating that specific moment—the kind of simple dinner that somehow turns into a memory.
The Air Fryer Magic
Air fryers work by circulating intensely hot air around food, which sounds clinical until you realize what that actually means: your chicken gets the crispiness of deep frying with a fraction of the oil. I've tried the same recipe in a regular oven and a convection oven, and the air fryer wins every single time because the heat is more aggressive and more consistent. The coating browns faster and more evenly, and the chicken inside stays juicy instead of drying out from prolonged cooking.
Coating Variations That Work
Once you understand how the basic breading clings and crisps, you can play around. I've swapped panko breadcrumbs in when I wanted extra crunch, tried nutritional yeast instead of Parmesan for a dairy-free version, and even mixed in a tablespoon of grated Pecorino when I wanted something sharper. The egg-and-milk base is what holds everything together, so as long as you keep that constant and adjust your dry mixture, you're safe to experiment.
Serving and Storage Wisdom
These tenders are best eaten within an hour of cooking while the coating is at peak crispiness, though they stay good in the refrigerator for three days if you're planning ahead. Reheat them in the air fryer for three to four minutes at 180°C rather than the microwave, which will turn that beautiful crust soft and sad. A Greek yogurt-based dip with fresh dill transforms them into something you'd order at a restaurant, and serving them alongside a bright salad or roasted vegetables makes the whole meal feel balanced and complete.
- Store leftovers in an airtight container to keep them from absorbing fridge odors.
- If you don't have an air fryer, a convection oven at 220°C for 15–18 minutes works—just flip halfway and watch closely.
- Double the batch and freeze the coated raw tenders on a tray before transferring to a freezer bag for quick future dinners.
 Pin It
 These tenders prove that eating well doesn't require choosing between what's easy and what's delicious. Make them once and they'll become part of your regular rotation.
Questions & Answers
- → What is the best way to achieve a crispy crust?
Using whole-wheat breadcrumbs combined with Parmesan and spices creates a crunchy coating when air-fried at the right temperature. Lightly spraying with olive oil also helps crispiness.
- → Can I bake the chicken strips instead of air-frying?
Yes, bake at 220°C (425°F) for 15–18 minutes, flipping halfway to ensure even browning and crispness.
- → Are there dairy-free coating alternatives?
Replace Parmesan cheese with nutritional yeast for a dairy-free crust that still adds flavor.
- → How can I make this dish gluten-free?
Substitute regular breadcrumbs with certified gluten-free breadcrumbs to accommodate gluten sensitivities.
- → What dipping sauces pair well with these chicken strips?
Greek yogurt-based dips, honey mustard, or spicy salsas complement the seasoned, crispy coating perfectly.