 Pin It
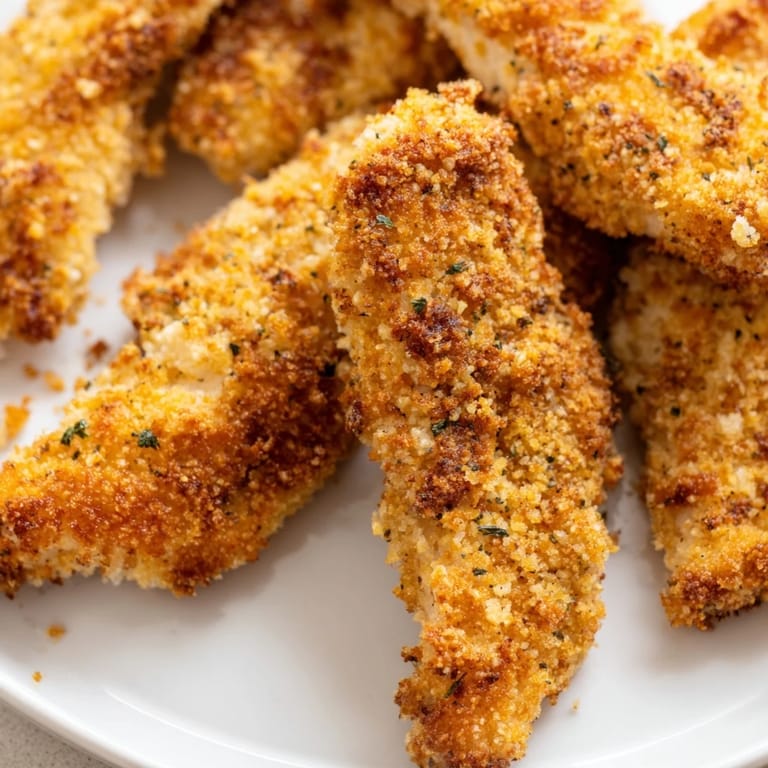
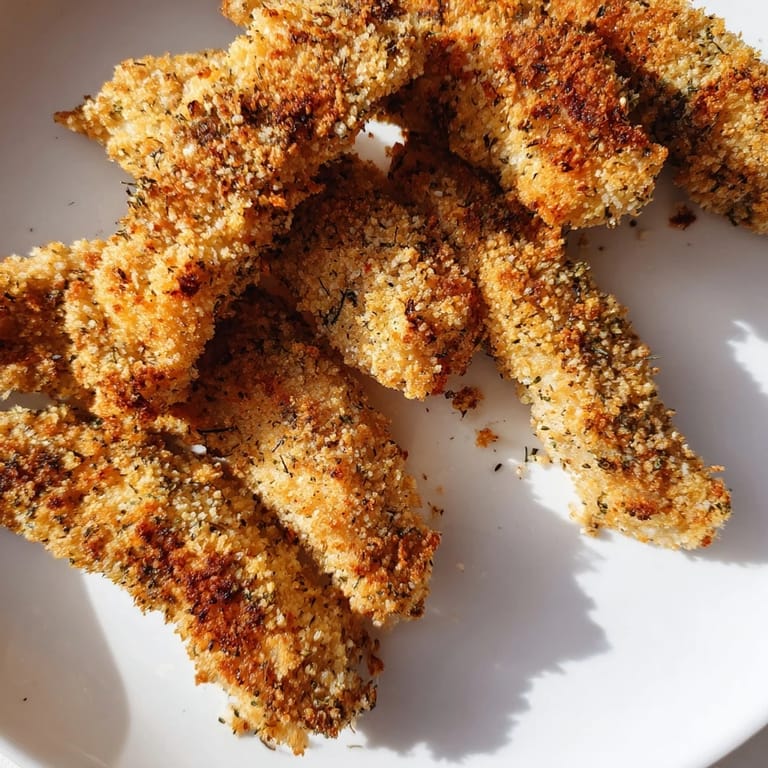
 The smell of toasted panko hit me before I even opened the oven door. I was testing this recipe on a Tuesday night, trying to coax my picky nephew into eating something that wasn't frozen nuggets. The strips came out so golden and crunchy that he grabbed one before I could even plate them. He looked at me, surprised, and said they tasted better than the drive-through kind.
I started making these strips during a phase when I wanted comfort food but also wanted to feel good after eating it. The first batch I made was a little pale, so I learned to crank the oven high and use a wire rack. Now, every time I pull these out, someone in the kitchen asks if they can have one right away. It has become my go-to when I need something reliable, tasty, and quick enough to make on a whim.
Ingredients
- Boneless, skinless chicken breasts or tenders: I like cutting breasts into strips myself because I can control the size, ensuring even cooking and a tender bite throughout.
- Salt and ground black pepper: Simple seasoning on the chicken itself makes sure every layer has flavor, not just the crust.
- All-purpose flour: This first dredge dries the surface so the egg mixture clings better, creating a sturdy base for the panko.
- Large eggs: Beaten with a bit of mayo, they form a sticky coating that locks the breadcrumbs in place.
- Mayonnaise or Greek yogurt: Adding this to the eggs makes the coating richer and helps the panko stick like glue.
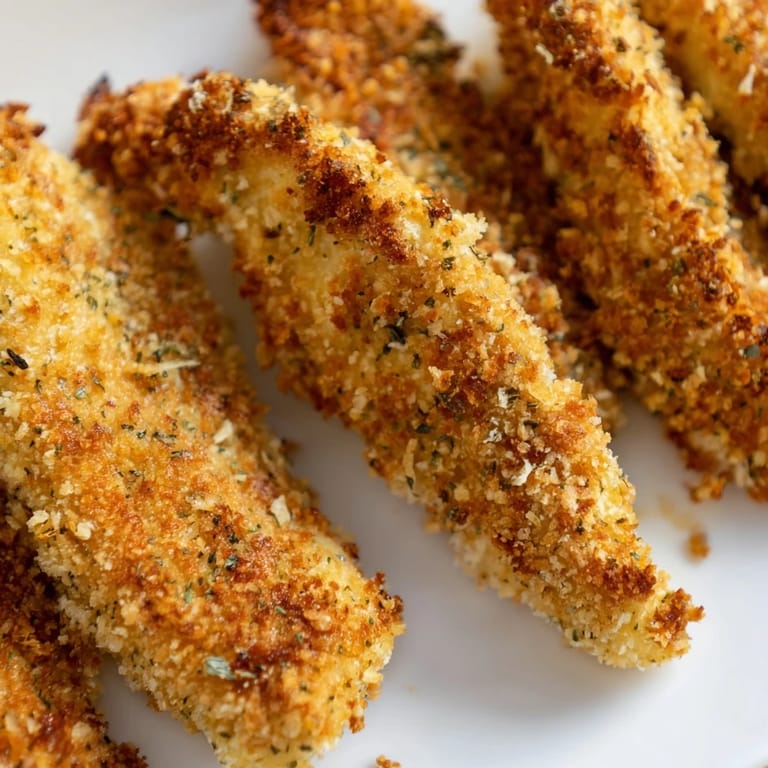
- Panko breadcrumbs: The secret to that shatteringly crisp texture, panko creates airy, jagged layers that brown beautifully in the oven.
- Dried Italian herbs: A blend of oregano, thyme, and basil adds a warm, familiar flavor that makes the crust taste like something from a good deli.
- Garlic powder: It spreads evenly through the panko and adds a subtle savory note without overpowering the chicken.
- Smoked paprika: Just half a teaspoon brings a hint of smokiness that makes these taste almost grilled.
- Cayenne pepper: Optional, but a pinch gives a gentle heat that sneaks up on you in the best way.
- Olive oil: A light drizzle before baking helps the panko toast to a deep golden color and adds just enough richness.
Tired of Takeout? 🥡
Get 10 meals you can make faster than delivery arrives. Seriously.
One email. No spam. Unsubscribe anytime.
Instructions
- Preheat and Prep:
- Set your oven to 220 degrees Celsius (425 degrees Fahrenheit) and line a baking sheet with parchment paper or, better yet, a wire rack for air circulation. This step makes all the difference in getting an evenly crispy bottom.
- Prepare the Chicken:
- Pat the chicken completely dry with paper towels, then slice it into strips about two centimeters wide. Season both sides with salt and pepper so the meat itself tastes seasoned, not just the coating.
- Set Up the Breading Station:
- Arrange three shallow bowls in a row: one with flour, one with eggs whisked together with mayonnaise until smooth, and one with panko mixed with Italian herbs, garlic powder, paprika, and cayenne if using. This assembly line makes coating quick and tidy.
- Coat Each Strip:
- Dredge a chicken strip in the flour, shake off the excess, dip it into the egg mixture, then press it firmly into the panko, turning to coat all sides. Repeat with the remaining strips, and try not to let your fingers get too goopy.
- Arrange and Oil:
- Place the coated strips on your prepared baking sheet, leaving a little space between each one. Drizzle or spray them lightly with olive oil to encourage that golden, crispy finish.
- Bake and Flip:
- Slide the pan into the oven and bake for 18 to 22 minutes, flipping the strips halfway through so both sides get evenly browned. Check that the internal temperature reaches 74 degrees Celsius (165 degrees Fahrenheit) to be sure they are cooked through.
- Cool Briefly:
- Let the strips rest on the pan for two to three minutes before serving. This short wait lets the crust set and become even crunchier.
 Pin It
 One evening, I made a double batch of these for a casual get-together, and they disappeared faster than anything else on the table. People kept coming back with little dipping bowls of honey mustard and ranch, and someone even mixed sriracha mayo on the spot. It was one of those moments where a simple recipe turned into the thing everyone remembered, and I realized that sometimes the best dishes are the ones that just make people happy without any fuss.
Dipping Sauce Ideas
I have tried these strips with all kinds of sauces, and each one brings out a different side of the crispy, herbed crust. Honey mustard adds a sweet tang that balances the savory panko, while ranch keeps things cool and creamy. For a little kick, I whisk together mayonnaise with sriracha and a squeeze of lime, and it has become my favorite way to serve them when I want something with a bit more attitude. You really cannot go wrong, so set out a few options and let everyone choose their own adventure.
Storing and Reheating
Leftovers keep well in an airtight container in the fridge for up to three days, though they rarely last that long in my house. When I reheat them, I skip the microwave and use a hot oven or toaster oven at around 200 degrees Celsius (400 degrees Fahrenheit) for about five to seven minutes. This brings back the crunch and makes them taste almost as good as when they first came out of the oven. Cold strips are fine for a quick snack, but warming them up is worth the extra few minutes.
Variations and Swaps
This recipe is very flexible, and I have tweaked it plenty of times depending on what I have on hand or what sounds good. For a gluten-free version, swap in gluten-free panko and all-purpose flour, and the texture stays just as crispy. If you want extra richness, toss a handful of grated Parmesan into the panko mixture before coating the chicken. Greek yogurt in place of mayonnaise lightens things up a bit, and adding a pinch more cayenne or some chili flakes gives the crust a spicier edge.
- Try using chicken thighs instead of breasts for a juicier, more forgiving bite that stays tender even if you overbake slightly.
- Add a tablespoon of sesame seeds to the panko for a subtle nutty crunch that surprises people in the best way.
- Brush the strips with melted butter instead of olive oil if you want a richer, more indulgent flavor.
 Pin It
 These crispy panko chicken strips have earned a permanent spot in my weekly rotation, and I hope they become one of your reliable favorites too. They are proof that you do not need a deep fryer to get that satisfying crunch, just a hot oven and a little bit of care.
Questions & Answers
- → How do I achieve maximum crispiness?
Use a wire rack on your baking sheet to allow air circulation underneath the strips. Flip them halfway through baking and ensure you lightly coat with olive oil. Letting them cool for 2-3 minutes after baking also helps set the crust.
- → Can I prepare these ahead of time?
Yes, you can bread the strips up to 4 hours in advance and refrigerate them on a covered plate. You can also freeze breaded strips for up to 3 months. Add 5-7 extra minutes to baking time if cooking from frozen.
- → What's the best way to keep them warm for a crowd?
Serve immediately after baking for optimal crispiness. If you need to hold them, keep finished strips in a 65°C (150°F) oven on a wire rack for up to 20 minutes without losing texture.
- → Can I use chicken thighs instead of breasts?
Absolutely. Thighs stay juicier during baking. Cut them into similar-sized strips and increase cooking time by 2-3 minutes since they're thicker. Check that the internal temperature reaches 74°C (165°F).
- → What dipping sauces pair best?
Honey mustard, ranch, and sriracha mayo are classics. Try tangy barbecue sauce, garlic aioli, or a lemon-herb yogurt dip for variety. The herbed coating complements both creamy and vinegar-based sauces beautifully.
- → How do I make this completely gluten-free?
Swap all-purpose flour for gluten-free flour blend and use gluten-free panko breadcrumbs. Check your mayonnaise or yogurt labels for hidden gluten. The rest of the ingredients are naturally gluten-free.