 Pin It
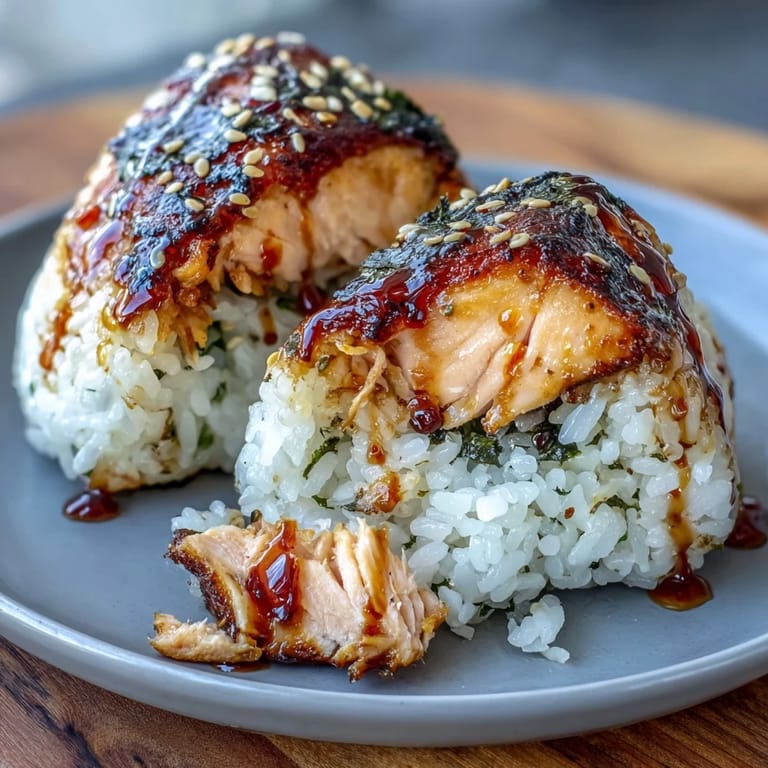
 The smell of sizzling sesame oil mingling with the sweet edge of mirin always makes me pause midsentence, no matter what kind of day Im having. I first made grilled salmon onigiri out of pure curiosity after spotting a beautiful rice ball beside a cup of green tea at a tiny Tokyo train station. Without meaning to, I found myself humming along to the crackle of the pan as I shaped the rice, the kitchen filling with warmth and promise. These onigiri are more than just a snack: the crisp edges and delicate salmon center invite you to slow down and savor each bite. You might just find yourself making a second batch before the first is even cool.
I thought of my friend Jun while grilling the salmon, remembering how we once laughed ourselves breathless trying to get the rice to stick during a stormy spring afternoon. Drops pattered at the window while our hands grew sticky, and somehow the messier our onigiri looked, the better they tasted. Shaping them together at the table became a competition of who could make the plumpest triangle. That sense of playful imperfection still sneaks into my kitchen every time I make these. No two onigiri ever look alike, but they all seem to disappear fast.
Ingredients
- Salmon fillet: Freshness really is everything for the filling—a quick brush of soy, mirin, and sesame oil brings out its buttery side, and even small pin-bones should be checked for with your fingertips.
- Soy sauce: This little drizzle infuses the salmon with a deep, slightly salty umami; Ive learned just a teaspoon goes a long way.
- Mirin: Adds gentle sweetness that rounds out any sharp flavors from the fish—dont skip it if you can help it, even cheap mirin works wonders.
- Toasted sesame oil: A drop or two is enough for aroma and flavor, but use it sparingly or itll overpower the fish.
- Japanese short-grain rice: Its the sticky, slightly chewy texture you want—rinse well to keep the grains distinct but able to hold together when shaped.
- Rice vinegar (optional): A splash at the end perks up the rice; I only started adding this after a friend showed me, and now I rarely forget.
- Nori sheets: Wrapping each onigiri helps with both flavor and handy eating, and using kitchen scissors for a clean cut means less crumbling.
- Toasted white sesame seeds (optional): Their nutty pop is subtle but delightful when sprinkled on top just before serving.
- Water and salt for shaping: Wet, salted hands are essential for molding and flavoring—keep a small bowl ready and dont be shy with the salt.
Tired of Takeout? 🥡
Get 10 meals you can make faster than delivery arrives. Seriously.
One email. No spam. Unsubscribe anytime.
Instructions
- Prepare the rice:
- Measure out the short-grain rice and rinse it under cold water, swirling gently until the water runs mostly clear to wash away excess starch. After draining well, cook the rice with fresh water in a rice cooker or pot; once finished, let it rest covered for ten minutes, then fluff with a paddle and sprinkle in salt and rice vinegar.
- Grill the salmon:
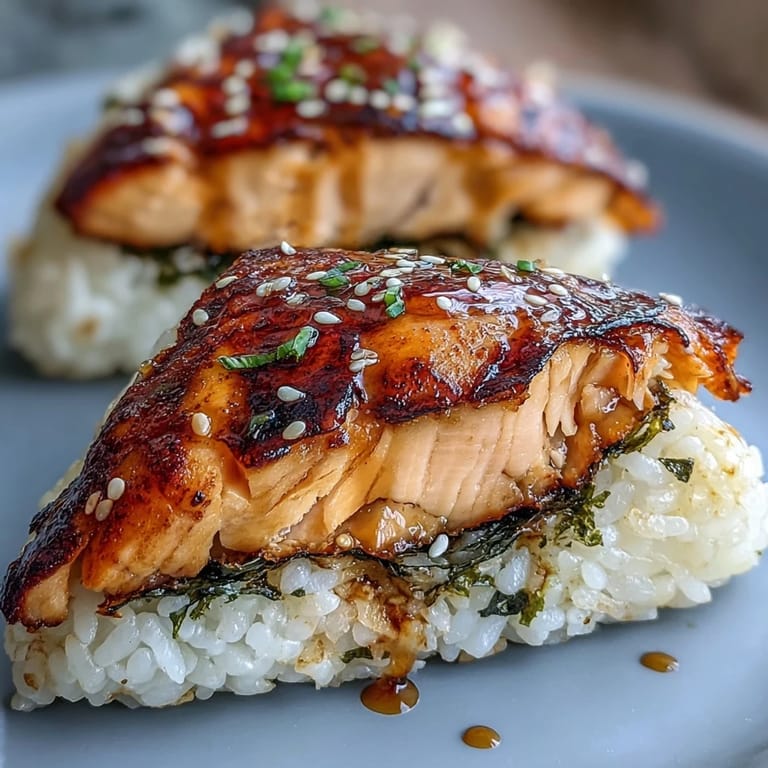
- Pat the salmon fillet dry, then paint it thoroughly with soy sauce, mirin, sesame oil, and a pinch each of salt and pepper. Cook in a hot oven or grill pan for 8–10 minutes until tender and golden at the edges; use a fork to gently flake it apart once cool enough to touch.
- Shape the onigiri:
- Fill a bowl with water for dipping your hands, then rub palms with a little salt; scoop about a third of a cup of the warm rice, flatten it in your hand, and drop a spoonful of salmon in the center. Cup the rice around the filling and mold into a triangle or oval, pressing just firmly enough so the grains cling together but dont become mushy.
- Crisp the onigiri:
- Lightly oil a nonstick skillet or grill pan and set it over medium heat; lay in the shaped onigiri and listen for a gentle sizzle as they brown—turn after 2–3 minutes per side or once the crust develops a toasty color, brushing with extra soy sauce if you crave more flavor.
- Wrap and finish:
- Take each onigiri and wrap a strip of nori around the bottom or side, then sprinkle the top with toasted sesame seeds if you like. Serve while warm, when the nori still has a snappy bite, or wait until room temperature for easy snacking later on.
 Pin It
 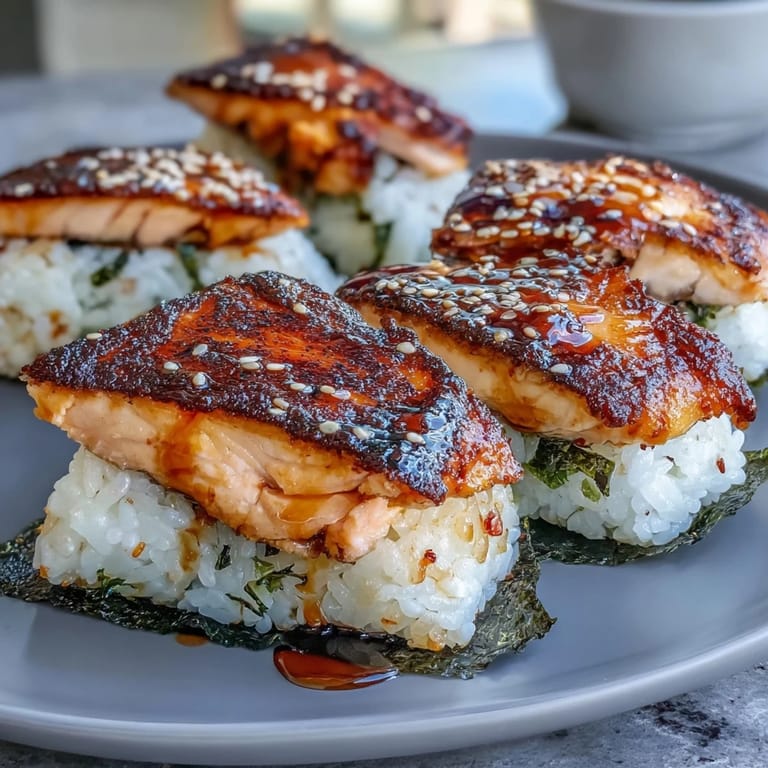 Pin It
 One sunny autumn afternoon, I packed a few warm onigiri into a lunchbox and walked to the park with my niece. We sat on a bench, unwrapping each rice ball in the breeze, making up stories for who would get the biggest or the most perfectly crisped edge. That simple meal turned an ordinary day into an unexpectedly sweet memory. Even now, the taste of grilled rice reminds me of her giggle. Food like this always seems to carry laughter along with it.
Perfect Pairings for Grilled Salmon Onigiri
If you want these onigiri to shine as the centerpiece, pair them with a bowl of miso soup or chilled cucumber salad. Ive found that slightly bitter green tea cuts through the richness of the salmon without overpowering the delicate rice. For little ones or spice lovers, a dab of wasabi hides beautifully inside or alongside. You might also try pickled ginger for a tangy kick—the contrast keeps each bite interesting. Experimenting with sides is half the fun here.
Keeping Onigiri Fresh and Tasty
Onigiri are at their absolute best the day theyre made, but I quickly learned that storing them wrapped in plastic with the nori separate keeps both rice and seaweed from getting mushy. A quick reheat in the microwave (just ten seconds or so) revives any leftover rice, making it almost as good as new. When packing for a picnic, slip a tiny ice pack alongside the box to keep everything cool and safe. Its a trick learned from watching careful mothers pack their childrens lunches on busy train mornings. Just dont forget to tuck the nori in a separate pouch if you love that crisp first bite.
Customizing Your Onigiri Experience
One of the best things about grilled onigiri is how easy it is to swap in fillings or toppings. Leftover teriyaki chicken or simple umeboshi works beautifully if you run out of salmon. I once added a sprinkle of shichimi togarashi for a little heat and never looked back. Play around with the flavors each time and see what combinations become your new go-tos.
- If in doubt, double the salmon filling—extras go fast.
- Toasted black sesame seeds make a striking garnish if you run low on white.
- Mold gently: over-compressing makes the rice heavy, so use just enough pressure to hold each shape.
 Pin It
  Pin It
 Whether you serve these onigiri warm from the skillet or wrap them up for a quiet lunch, they always taste best when shared. Here’s to many hands making light work—and delicious rice balls.
Questions & Answers
- → What rice is best for onigiri?
Use Japanese short-grain rice for its natural stickiness; rinse until the water runs clear, cook until tender, then let rest before seasoning with a touch of salt or rice vinegar.
- → How do I prevent the onigiri from falling apart?
Work with warm rice, wet and lightly salted hands, and press firmly but gently. Let shaped pieces rest briefly to set before searing or wrapping in nori.
- → Can I use canned salmon instead of fresh?
Yes—drain and flake canned salmon, adjust soy and mirin to taste, and remove excess moisture. Canned fish is convenient and holds up well inside rice.
- → How do I get a crisp exterior without drying the filling?
Lightly oil a nonstick skillet and cook over medium heat 2–3 minutes per side until golden. Brush with a little soy before flipping to add flavor while keeping the interior moist.
- → How should leftovers be stored and reheated?
Cool to room temperature, wrap tightly and refrigerate up to 2 days. Reheat gently in a skillet or oven to restore the crust; microwaving can make rice gummy.
- → What are good pairings for these onigiri?
They pair well with green tea or miso soup, pickled vegetables, a dab of wasabi or umeboshi, and a sprinkle of toasted sesame for extra aroma.