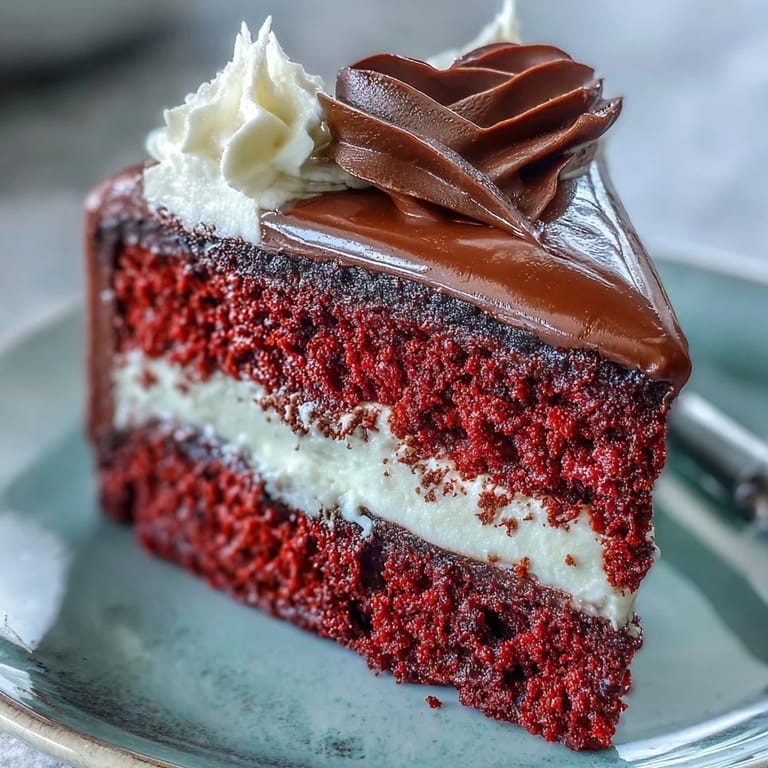
Red Betty Boop Heart Cake

Featured in: Desserts & Baking

This striking heart-shaped creation features vibrant red velvet layers with a tender, moist crumb that balances sweetness with a subtle tang. The luxurious cream cheese frosting adds rich, creamy contrast between layers and across the exterior. What makes this truly special is the crisp dark chocolate Betty Boop silhouette perched atop—a playful nod that creates delightful textural contrast against the smooth frosting. The entire ensemble comes together in about 90 minutes, yielding 12 impressive portions perfect for celebrations or romantic occasions.

Updated on Sun, 01 Feb 2026 12:09:00 GMT
A slice of the Red Betty Boop Heart Cake reveals soft red crumb with velvety cream cheese frosting and a crisp dark chocolate silhouette on a white plate. Pin It
A slice of the Red Betty Boop Heart Cake reveals soft red crumb with velvety cream cheese frosting and a crisp dark chocolate silhouette on a white plate. | urbanspatula.com

The kitchen counter was covered in red speckles, like a tiny crime scene of baking enthusiasm. I'd been attempting red velvet cakes for years, but they always came out closer to rusty brown than that dramatic crimson I was chasing. This recipe finally cracked the code, and adding a Betty Boop silhouette made it feel like something my grandmother would have gotten a kick out of—she loved that sassy cartoon character.

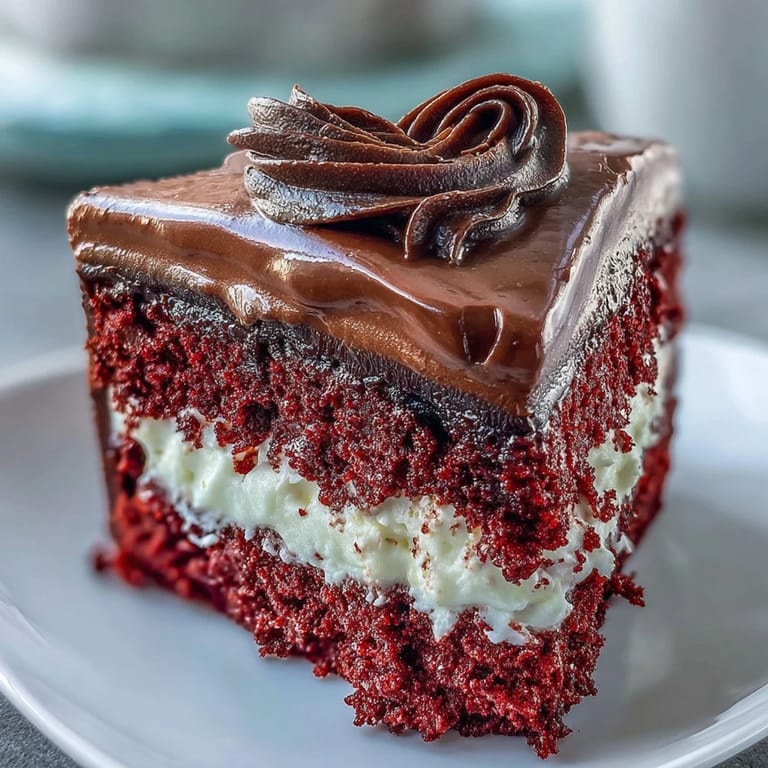
My sister asked me to make this for her vintage-themed birthday party, and I nearly panicked when the first Betty Boop silhouette cracked while peeling it off the parchment. I made three backups just in case, but somehow that slightly imperfect one ended up on the cake and nobody noticed—they were too busy exclaiming over the surprise chocolate detail against all that red.

Ingredients

  • Cake flour: The lower protein content keeps the crumb tender and soft
  • Natural cocoa powder: Just enough to deepen the flavor without turning the cake brown
  • Red gel food coloring: Liquid coloring will thin your batter, so gel is non-negotiable here
  • Buttermilk: This is what gives red velvet its signature tang and tender texture
  • Cream cheese: Make sure it's properly room temperature or you'll end up with lumpy frosting
  • Dark chocolate or candy melts: The bitter snap against sweet frosting is what makes the silhouette work

Instructions

Product image
Prepare wholesome dog meals by mixing with warm water for easy serving and homemade-style feeding.
Check price on Amazon
Prep your pans and oven:
Heat your oven to 350°F and grease two heart-shaped pans with butter, then line the bottoms with parchment paper so you don't have to worry about sticking.
Whisk the dry ingredients:
Combine the cake flour, cocoa powder, baking powder, baking soda, and salt in a medium bowl and set it aside.
Cream the butter and sugar:
Beat the butter for about a minute until it's creamy, then gradually add the sugar and let it go for another 2–3 minutes until the mixture looks pale and fluffy.
Add the eggs and flavor:
Drop in the eggs one at a time, mixing just until each one disappears, then add the red gel coloring, vanilla, and vinegar until everything turns a uniform crimson.
Combine wet and dry:
Mix in the dry ingredients and buttermilk in alternating batches, keeping the mixer on low so you don't overwork the batter.
Activate the lift:
Stir that last teaspoon of vinegar into the baking soda until it fizzes, then gently fold it through the batter.
Bake the layers:
Divide the batter between your prepared pans and bake for 25–30 minutes until a toothpick comes out clean.
Make the frosting:
Beat the cream cheese and butter until smooth, then gradually add the powdered sugar and vanilla until you have something spreadable and fluffy.
Assemble and coat:
Stack your cooled layers with frosting between them, apply a thin crumb coat, and chill for 10 minutes before adding the final smooth layer.
Create the silhouette:
Place your Betty Boop stencil under parchment paper and pipe or brush melted dark chocolate over the outline, then let it set completely before carefully transferring it to the cake.
Product image
Prepare wholesome dog meals by mixing with warm water for easy serving and homemade-style feeding.
Check price on Amazon
Red Betty Boop Heart Cake stands tall with smooth white frosting and a glossy dark chocolate character, ready for birthday celebrations or retro-themed dessert parties. Pin It
Red Betty Boop Heart Cake stands tall with smooth white frosting and a glossy dark chocolate character, ready for birthday celebrations or retro-themed dessert parties. | urbanspatula.com

Serving this at that party felt like bringing a little piece of retro charm to life—my sister actually teared up when she saw Betty Boop perched on top, reminding her of Saturday morning cartoons at our grandmother's house.

Getting That Perfect Red

I've learned that red gel coloring is one ingredient where splurging pays off. The cheap stuff gives you a dull raspberry shade, while the professional brands turn your batter into something impossibly vivid with just a squeeze or two.

Working With Chocolate Silhouettes

Make your silhouettes the day before you need them if possible. Chocolate needs time to fully set, and trying to rush this step is how you end up with a broken Betty Boop and a lot of last-minute stress.

Serving And Storing

This cake actually tastes better after chilling for a few hours—the frosting firms up and the flavors meld together beautifully. Just let it sit at room temperature for about 15 minutes before serving so the texture softens up again.

  • Slice with a warm knife for clean edges through the chocolate silhouette
  • Keep any leftovers covered in the refrigerator where they'll stay fresh for up to four days
  • Press any chocolate decoration pieces back into place if they shift during chilling
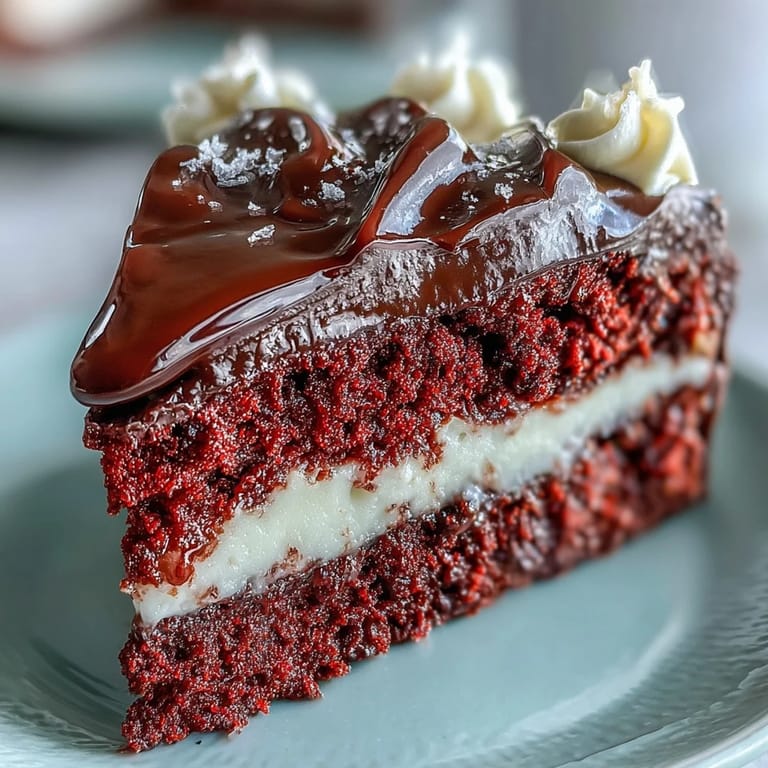
Product image
Quickly cook hard boiled, poached, or scrambled eggs and omelets for easy breakfasts and meal prep.
Check price on Amazon
Homemade Red Betty Boop Heart Cake shows a vibrant heart shape, sweet-tangy cream cheese swirls, and a striking dark chocolate accent for a playful vintage look. Pin It
Homemade Red Betty Boop Heart Cake shows a vibrant heart shape, sweet-tangy cream cheese swirls, and a striking dark chocolate accent for a playful vintage look. | urbanspatula.com

There's something wonderful about a cake that looks this impressive coming out of a home kitchen. Every time I make it now, I think about how my grandmother would have absolutely insisted on having the biggest slice.

Questions & Answers

What makes the red color so vibrant?

Gel-based food coloring provides the most intense red hue without thinning the batter or altering the final texture. The acidic interaction between buttermilk and vinegar also helps maintain the bright red tone during baking.

Can I make the chocolate silhouette ahead of time?

Absolutely. Prepare the dark chocolate silhouette up to a week in advance and store between sheets of parchment paper in an airtight container at room temperature. Handle gently when placing on the finished cake.

Why use both vinegars in the batter?

White vinegar adds subtle tang that enhances the red velvet flavor profile, while the baking soda distilled in vinegar creates immediate foam. This reaction produces extra lift for a lighter, more tender crumb structure.

How do I achieve smooth frosting edges?

Apply a thin crumb coat first and chill for 10-15 minutes to set. For the final layer, run your offset spatula under hot water, dry thoroughly, then smooth the frosting while warm. This melts any imperfections for a glass-like finish.

Can I use regular cocoa powder instead of natural?

Natural cocoa powder works best here because it reacts with baking soda for proper leavening. Dutch-processed cocoa has been alkalinized and won't provide the same rise, potentially resulting in denser layers.

What's the best way to store leftovers?

Cover the cut cake with plastic wrap or store in an airtight container in the refrigerator for up to 4 days. The cream cheese frosting requires refrigeration, but bring slices to room temperature 15-20 minutes before serving for optimal flavor and texture.

Red Betty Boop Heart Cake

Soft red layers with tangy cream cheese frosting and playful dark chocolate silhouette decoration.

Prep Time
30 minutes
Cook Time
30 minutes
Overall Time
60 minutes
Created by Carter Phillips


Skill Level Medium

Cuisine American

Portions 12 Serving Size

Diet Preferences Meat-Free

What You’ll Need

For the Cake

01 2½ cups cake flour, sifted
02 2 tablespoons natural unsweetened cocoa powder
03 1½ teaspoons baking powder
04 ½ teaspoon baking soda
05 ½ teaspoon fine sea salt
06 1 cup unsalted butter, room temperature
07 1¾ cups granulated sugar
08 4 large eggs, room temperature
09 1 cup buttermilk, room temperature
10 2 tablespoons red gel food coloring
11 2 teaspoons pure vanilla extract
12 2 teaspoons distilled white vinegar

For the Cream Cheese Frosting

01 1 cup cream cheese, room temperature
02 ½ cup unsalted butter, room temperature
03 4 cups powdered sugar, sifted
04 1 tablespoon pure vanilla extract
05 Pinch of salt

For the Betty Boop Silhouette Decoration

01 6 ounces dark chocolate or candy melts, melted
02 Parchment paper
03 Betty Boop heart-shaped stencil, printed or hand-drawn to scale

How-To Steps

Step 01

Prepare Cake Pans: Preheat oven to 350°F. Grease two 9-inch heart-shaped cake pans and line the bottoms with parchment paper.

Step 02

Combine Dry Ingredients: In a medium bowl, whisk together cake flour, cocoa powder, baking powder, baking soda, and sea salt. Set aside.

Step 03

Cream Butter and Sugar: In the bowl of a stand mixer fitted with the paddle attachment, beat butter on medium speed for 1 minute until creamy. Gradually add sugar and continue beating for 2 to 3 minutes until light and fluffy.

Step 04

Incorporate Eggs: Add eggs one at a time, beating on low speed after each addition just until blended. Scrape down the bowl sides as needed.

Step 05

Add Coloring and Flavorings: Stir in red gel food coloring, vanilla extract, and white vinegar until the batter is evenly colored.

Step 06

Alternate Dry and Wet Ingredients: With the mixer on low, add one-third of the dry ingredients, then half of the buttermilk, mixing just until incorporated. Repeat with another third of dry ingredients and remaining buttermilk, then finish with the last third of dry ingredients. Do not overmix.

Step 07

Activate Baking Soda: In a small cup, combine 1 teaspoon vinegar with baking soda, then gently fold into the batter. The mixture will foam slightly, creating a light crumb.

Step 08

Fill and Bake Cakes: Divide the batter evenly between the prepared pans, smoothing the tops with an offset spatula. Bake on the center rack for 25 to 30 minutes, or until a toothpick inserted in the center comes out clean.

Step 09

Cool Cakes: Let cakes cool in pans for 10 minutes. Run a thin knife around the edges, then invert onto wire racks and remove parchment. Cool completely before frosting.

Step 10

Prepare Cream Cheese Frosting: In a clean mixer bowl, beat cream cheese and butter on medium speed for 2 minutes until smooth. Gradually add powdered sugar and a pinch of salt, then vanilla extract, beating on low until combined and fluffy. Transfer to a piping bag or keep covered in the refrigerator until ready.

Step 11

Assemble Cake Layers: If desired, level cake domes with a serrated knife. Place one heart cake layer on a cake board or plate. Pipe or spread an even layer of frosting (about three-quarter cup) over the top. Top with the second cake layer, press gently, and refrigerate for 15 minutes to set the crumb coat.

Step 12

Frost Cake: Apply a thin crumb coat of frosting over the entire cake. Chill for another 10 minutes, then add a final smooth layer of frosting. Use an offset spatula to create swirls or leave smooth as desired.

Step 13

Create Chocolate Silhouette: Place the printed stencil under a sheet of parchment. Pipe or brush melted dark chocolate over the outline on the parchment. Allow the chocolate silhouette to fully set at room temperature or in the refrigerator for 10 minutes.

Step 14

Apply Silhouette to Cake: Carefully peel the chocolate silhouette from the parchment and lift it onto the center of the cake. Press gently so it adheres to the frosting.

Step 15

Garnish and Chill: Decorate the cake edges with additional frosting rosettes, edible glitter, or red sugar pearls. Chill the cake for 30 minutes before serving to let the frosting set. Slice with a warm, clean knife for neat hearts.

Tools You’ll Need

  • Stand mixer or electric hand mixer
  • Mixing bowls
  • Measuring cups and spoons
  • Two 9-inch heart-shaped cake pans
  • Offset spatula
  • Wire racks
  • Parchment paper
  • Serrated knife
  • Piping bag
  • Betty Boop heart-shaped stencil, printed or hand-drawn

Allergy Warnings

Review every ingredient for allergens and ask a professional if you’re unsure.
  • Contains wheat (gluten)
  • Contains eggs
  • Contains dairy (butter, cream cheese, buttermilk)
  • May contain soy (check chocolate or candy melt labels for allergens)

Nutrition Info (for each serving)

These nutrition details are for reference and don’t replace medical guidance.
  • Energy: 550
  • Fats: 25 g
  • Carbohydrates: 73 g
  • Proteins: 5 g