 Pin It
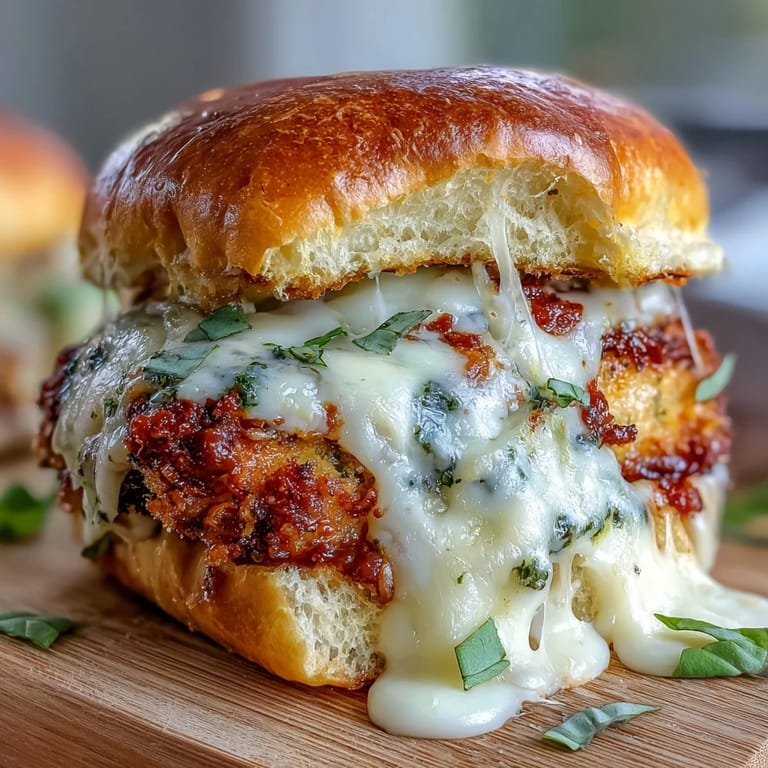
 My neighbor showed up at my door with a plate of these sliders last summer, and I nearly devoured half of them before she finished explaining where the recipe came from. There's something about the combination of crispy pesto-coated chicken, tangy marinara, and melted mozzarella crammed into a soft brioche bun that just works. After she left, I immediately started jotting down what I could taste and reconstruct, then spent the next week perfecting my own version. Now they're my go-to when friends pop over unannounced or when I need something that looks impressive but doesn't demand hours in the kitchen.
I made these for a book club gathering once, nervous about whether they'd survive the twenty-minute drive to Sarah's place without falling apart. Not only did they travel beautifully, but they disappeared so fast that someone asked if I'd made the full batch in her kitchen. That's when I realized these sliders had some real staying power, both literally and in people's memories of the meal.
Ingredients
- Boneless, skinless chicken breasts: Two large ones give you enough to cut into twelve substantial pieces that cook evenly and stay juicy when breaded.
- Panko breadcrumbs: They stay crispier longer than regular breadcrumbs, and honestly, that's the difference between soggy and satisfying.
- Grated Parmesan cheese: Don't skip this in the breading mix, it adds this salty, umami punch that regular breadcrumbs could never deliver on their own.
- Basil pesto: Use the good stuff or make your own if you can, jarred pesto works but fresh-tasting pesto changes everything about these sliders.
- Mini brioche slider buns: These soft, slightly sweet buns are what separate a slider from just a regular sandwich, they soak up the flavors without falling apart.
- Shredded mozzarella cheese: Fresh mozzarella would be too delicate, shredded melts better and creates that gorgeous stringy pull.
- Marinara sauce: Keep it simple here, the good quality jarred ones work perfectly and let the other flavors shine.
Tired of Takeout? 🥡
Get 10 meals you can make faster than delivery arrives. Seriously.
One email. No spam. Unsubscribe anytime.
Instructions
- Prep your workspace and heat the oven:
- Get your oven to 400°F and line a baking sheet with parchment paper so your chicken won't stick and cleanup won't be a nightmare. Having everything ready before you touch the chicken makes the whole process flow so much smoother.
- Coat the chicken pieces:
- Cut your chicken breasts into twelve roughly equal pieces, then toss them in a bowl with olive oil, garlic powder, salt, and pepper until every piece is glistening and evenly seasoned. This is where the flavor really starts building.
- Create the crispy coating:
- Mix your panko, Parmesan, and dried Italian herbs in a shallow dish, then dredge each chicken piece in the breadcrumb mixture, pressing firmly so the coating actually sticks. Don't be shy with the pressing, it's what creates that satisfying crunch.
- Bake the chicken until golden:
- Spread the breaded pieces on your parchment-lined sheet and bake for fifteen to eighteen minutes until they're golden brown and cooked all the way through. The kitchen will smell absolutely incredible at this point.
- Prepare your bun bases while chicken bakes:
- Slice your slider buns in half and spread about two teaspoons of pesto on each bottom half, getting a little bit into the corners. This is your flavor foundation for everything that comes next.
- Build each slider:
- Once the chicken is done, place one piece on each pesto-covered bun bottom, then spoon about a tablespoon of marinara over the chicken, and top with a small handful of shredded mozzarella. Don't overstuff or they'll squeeze out when you bite down.
- Top and butter the sliders:
- Put the bun tops on each slider, arrange them snugly in a baking dish, and brush melted butter over the tops of all the buns. The butter creates this gorgeous golden finish that makes them look bakery-quality.
- Final bake to melt everything:
- Pop the assembled sliders back in the oven for five minutes at 400°F just until the cheese is melted and the buns get a light toast. Watch them closely here, they go from perfect to slightly overdone pretty quickly.
- Garnish and serve warm:
- Sprinkle fresh parsley over the top if you want a pop of green color, though honestly they look pretty stunning without it. Serve them right away while everything is still warm and melty.
 Pin It
 My eight-year-old nephew asked to help make these last spring, and suddenly what was a quick appetizer became this whole event where he insisted on pressing each piece of chicken into the breadcrumb coating. Watching his face light up when he bit into one and discovered all the layers was honestly better than any compliment from an adult. These sliders became our thing after that, something he'd ask for whenever I visited.
Storage and Make-Ahead Options
You can bread the chicken pieces and refrigerate them on a sheet up to eight hours ahead, which means the real work happens right before guests arrive. If you've already baked the chicken, reheat it gently in a 350°F oven for about five minutes before assembling to keep it moist and tender. I've also frozen fully assembled but unbaked sliders for up to two weeks, then baked them straight from frozen, adding just three extra minutes to the final baking time.
Flavor Combinations Worth Trying
Once you nail the basic formula, these sliders become your canvas for experimenting with different flavor combinations that match whatever mood you're in. Swap the pesto for sun-dried tomato spread, use fontina instead of mozzarella for a richer taste, or add roasted red peppers under the cheese for brightness and sweetness. The beauty is that the breaded chicken and marinara foundation stays consistent, so you can pivot pretty easily depending on what you have on hand or what sounds good that day.
Serving Ideas and Pairing Suggestions
These sliders genuinely shine when served warm straight from the oven, ideally at a gathering where people can grab them easily and eat with their hands. Set out a small bowl of extra marinara for dipping because people always want it, even if there's already sauce inside the slider. A simple arugula salad with lemon vinaigrette on the side cuts through the richness beautifully, or if you're keeping things casual, just throw out some veggie sticks and call it a day.
- Make sure your baking dish is just big enough to hold all twelve sliders snugly, they'll hold heat better and toast more evenly that way.
- If you're feeding a crowd, these double easily and actually bake more consistently when you're doing two full pans side by side.
- Fresh parmesan shaved on top after cooking instead of mixed into the breadcrumbs adds a fancy touch if you're trying to impress someone.
 Pin It
 These sliders have become my answer to so many occasions, from casual Friday nights to bringing something unexpected to a potluck. There's something genuinely satisfying about feeding people food that tastes restaurant-quality but feels completely doable in your own kitchen.
Questions & Answers
- → What type of chicken works best for these sliders?
Boneless, skinless chicken breasts cut into pieces ensure even breading and cooking, providing a juicy interior and crispy coating.
- → Can I substitute the mozzarella cheese?
Yes, provolone or fontina cheese can be used as alternatives to mozzarella for a slightly different flavor and melt.
- → How do I make the sliders without baking from scratch?
Use rotisserie chicken tossed in basil pesto as a shortcut to save time without sacrificing flavor.
- → What is the best way to toast the slider buns?
After assembly, brush the tops with melted butter and bake at 400°F for about 5 minutes until the cheese melts and buns turn lightly golden.
- → Are these sliders suitable for parties?
Yes, their bite-sized form and rich flavors make them an excellent choice for party trays or casual gatherings.
- → Is it necessary to garnish with parsley?
Garnishing with fresh parsley is optional, but it adds a bright, fresh note and an appealing presentation.