 Pin It
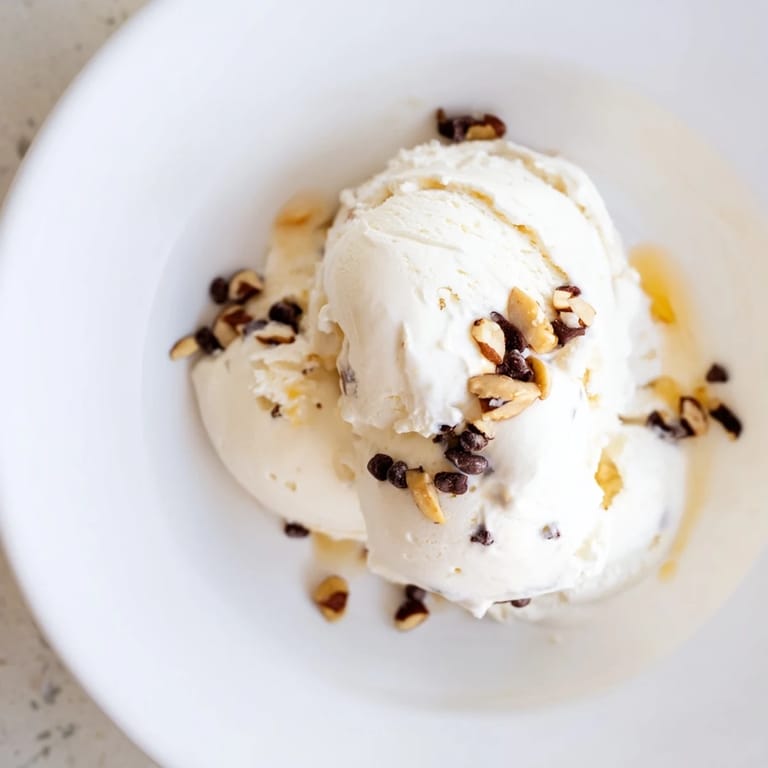
 My friend swore by cottage cheese ice cream before I ever tasted it, and I spent weeks dismissing the idea as a viral fad destined to disappoint. Then one summer afternoon when my freezer held nothing but ice packs and regret, I finally decided to test the theory myself. Two minutes with a blender and I understood the hype—the texture was impossibly silky, the tartness from the cottage cheese cut through the sweetness in a way that felt almost refreshing. It became my go-to dessert that summer, something I could make on a whim without special equipment or complicated steps.
I made this for a dinner party where someone mentioned they were tired of typical desserts, and watching their face when I explained the main ingredient was cottage cheese was worth the whole evening. The surprise dissolved quickly into genuine delight once they tasted it, and by the end of the night, two people asked for the recipe. That's when I realized this wasn't just a viral trend—it was something genuinely good that happened to be easy enough to make on any Tuesday night.
Ingredients
- Full-fat cottage cheese (2 cups): Use the full-fat version without hesitation—it blends into a silky base that low-fat versions struggle to achieve, and the flavor is noticeably richer.
- Honey or maple syrup (1/3 cup): This sweetens while maintaining that subtle tang that makes the ice cream interesting, but feel free to adjust based on your cottage cheese's tanginess.
- Pure vanilla extract (1 teaspoon): Don't skip this or use imitation; it adds depth that balances the dairy notes beautifully.
- Salt (pinch): A tiny pinch brightens everything and keeps the sweetness from feeling cloying.
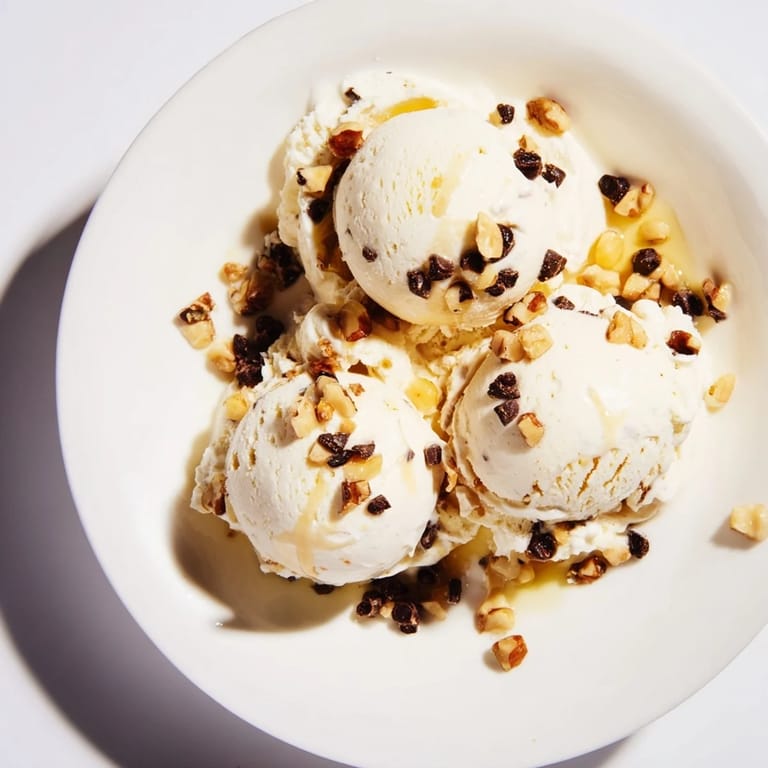
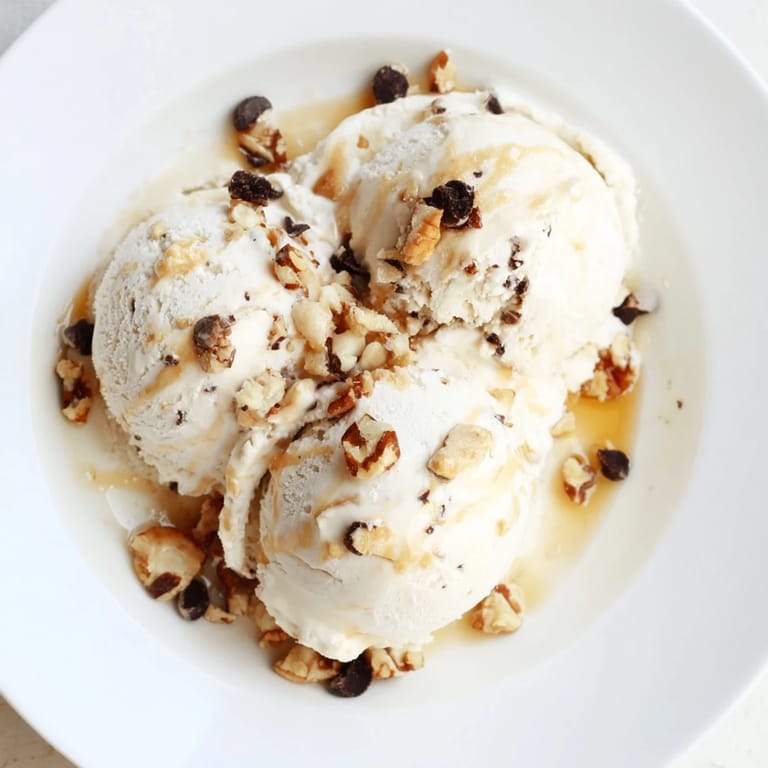
- Fresh berries, chocolate chips, nuts, or nut butter (optional mix-ins): Choose what calls to you, or mix and match—frozen berries add tartness, chocolate adds richness, nuts add texture, and nut butter swirls create those unexpected pockets of flavor.
Tired of Takeout? 🥡
Get 10 meals you can make faster than delivery arrives. Seriously.
One email. No spam. Unsubscribe anytime.
Instructions
- Blend until completely smooth:
- Pour the cottage cheese, sweetener, vanilla, and salt into your blender and blend on high speed, stopping a couple of times to scrape down the sides where the thicker curds like to hide. You'll know it's ready when it looks like soft serve consistency, completely lump-free and creamy.
- Fold in your chosen mix-ins:
- Use a spatula to gently fold in whatever mix-ins you've selected, being careful not to break up the texture you just created. If using chocolate chips, make sure they're mini ones so they freeze properly and don't become rock-hard.
- Transfer and freeze:
- Smooth the mixture into a freezer-safe container, then pop it in the freezer for at least two to four hours until it's firm enough to scoop.
- Let it soften slightly before serving:
- Pull it out five to ten minutes before you want to scoop to let it warm just slightly at room temperature, which makes scooping infinitely easier and lets the flavors shine through.
 Pin It
 What surprised me most was how this became the dessert I made when someone was having a rough day or needed celebrating. There's something about a homemade ice cream that requires no special skills or expensive ingredients that feels genuinely generous. It's proof that the best kitchen moments don't come from complicated recipes but from things simple enough to make anytime.
Flavor Variations That Work
Beyond the basic setup, you can lean into nearly any direction. For chocolate lovers, blend in two tablespoons of unsweetened cocoa powder with the base—it intensifies without adding extra sugar. I've had success swirling in fruit preserves or caramel sauce right before freezing, which creates ribbons of flavor throughout. Some people blend in a tablespoon of espresso powder for a coffee version that's subtle but noticeable. The beauty of this recipe is that the cottage cheese base is forgiving enough to accommodate whatever you want to throw at it.
Sweetness and Customization
Cottage cheese carries a natural tang that pairs beautifully with sweetness, but the exact balance depends on what you prefer. If your cottage cheese tastes particularly sour, you might lean toward the full amount of honey or maple syrup. Some people have switched to sugar-free syrup and reported good results, though the texture shifts very slightly. The real trick is tasting a tiny spoonful of the blended base before freezing—it should taste a touch sweeter than you want the final product to be, since cold dulls sweetness perception.
Storage and Last-Minute Thoughts
This keeps in the freezer for about a week before the texture starts to change, though honestly it rarely lasts that long. If it's been in there for days and hardens up solid, let it sit on the counter for ten to fifteen minutes before scooping. The mix-ins matter more than you'd think—fresh berries stay softer, chocolate chips get harder, and nuts maintain their texture beautifully throughout the freezing.
- Add a sprinkle of granola right before serving to introduce a textural contrast that changes everything.
- If you're making this for guests, prepare it a few hours ahead so it's ready to serve without fussing around in front of people.
- Start with the basic version before experimenting—once you understand the texture and taste, the variations become intuitive.
 Pin It
 This recipe proved to me that the internet gets some things right—sometimes the simplest ideas, shared by strangers online, actually deserve the hype. It's become my favorite dessert to make on ordinary days.
Questions & Answers
- → Can I use low-fat cottage cheese instead of full-fat?
Yes, but full-fat cottage cheese yields a creamier texture and richer flavor in the final dessert.
- → How long should I freeze the mixture?
Freeze for 2–4 hours or until firm enough to scoop comfortably.
- → Can I add mix-ins after freezing?
It's best to fold in mix-ins before freezing to ensure even distribution throughout the dessert.
- → What alternatives can replace honey or maple syrup?
Agave nectar, molasses, or sugar-free syrups work well to adjust sweetness according to preference.
- → Do I need an ice cream maker for this?
No special equipment is required—just a blender or food processor and a freezer-safe container.