 Pin It
 My kitchen was chaos the week before Christmas—flour everywhere, three different baking projects competing for oven space—when my neighbor stopped by with a block of Nutella and the simplest suggestion: "Make something festive with it." That afternoon, I started layering puff pastry with that creamy chocolate-hazelnut goodness, and by the time I'd carved out the first tree shape and twisted its branches, I knew I'd found our new holiday tradition. These little trees are so effortless, yet they look like you spent hours in the kitchen perfecting them.
I'll never forget watching my eight-year-old carefully twist the branches on her first tree—she took it so seriously, turning each one just a quarter inch more than the last. When they came out of the oven, puffed and golden, she gasped like she'd performed actual magic. That's when I realized these weren't just desserts; they were small moments of joy wrapped in crispy pastry.
Ingredients
- Puff pastry (2 sheets, about 250 g each): The star of the show—thaw it completely at room temperature so it's easy to work with, and handle it gently to keep all those beautiful flaky layers intact.
- Nutella (120 g): This is your filling, but don't spread it so thick that it oozes out when the pastry puffs; a thin, even layer keeps everything neat and lets the pastry shine.
- Egg (1, beaten): The egg wash gives these trees that gorgeous golden-brown sheen that makes them look professionally baked.
- Powdered sugar (1 tbsp, optional): A final dusting of snow transforms them into little edible winter scenes—skip it if you prefer to taste only the chocolate.
Tired of Takeout? 🥡
Get 10 meals you can make faster than delivery arrives. Seriously.
One email. No spam. Unsubscribe anytime.
Instructions
- Heat Your Oven and Set the Stage:
- Preheat to 200°C (400°F) and line a baking tray with parchment paper so your trees won't stick and will bake evenly. A hot oven is your friend here—it's what makes the pastry puff dramatically.
- Layer Your Pastry and Spread the Nutella:
- Unroll one sheet of puff pastry and spread Nutella evenly across it, leaving about a 1-cm border so the filling doesn't squeeze out when you layer the second sheet on top. Press gently to seal them together.
- Cut Out Your Trees:
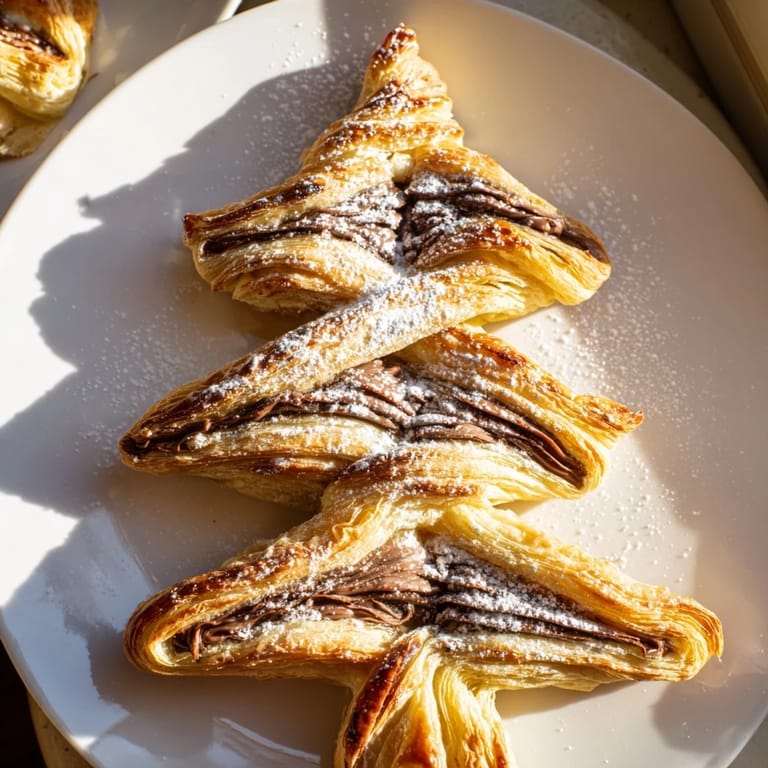
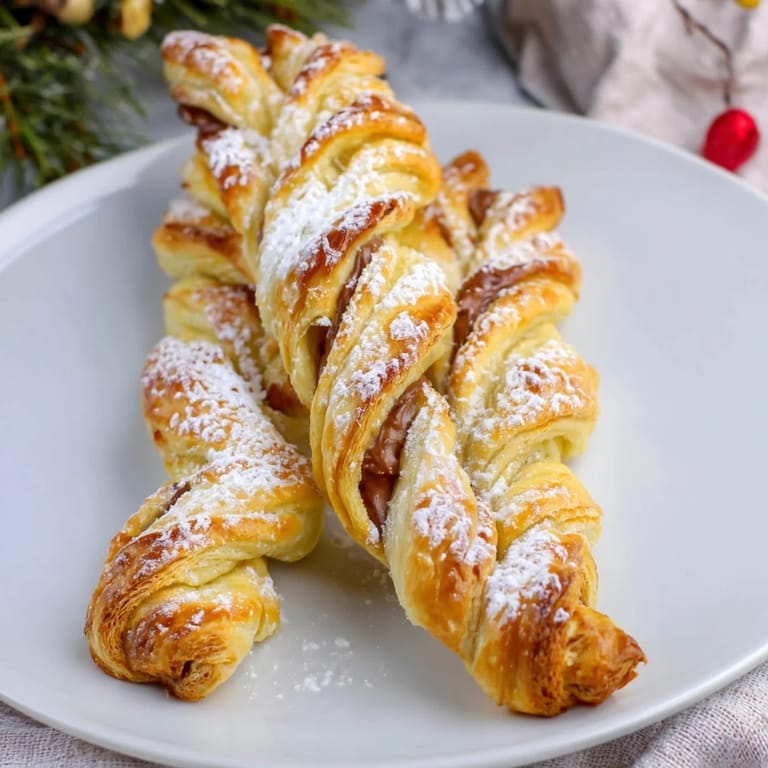
- Using a sharp knife or a tree-shaped cookie cutter, cut out tree shapes about 12–15 cm tall. Save those scraps—you can re-roll them to cut more trees and make the most of your pastry.
- Add Decorative Branches:
- Place your trees on the parchment-lined tray, then carefully score horizontal lines on both sides of each tree with your knife, leaving the center trunk untouched. Gently twist each branch to give them dimension and that playful, hand-made look.
- Brush with Egg Wash:
- Using a pastry brush, coat each tree with beaten egg—this is what gives them that beautiful golden finish and helps the pastry puff up evenly.
- Bake Until Golden:
- Pop them into the oven for 16–18 minutes, watching for that moment when they puff up and turn a rich golden brown. The kitchen will smell incredible.
- Cool and Finish:
- Let them cool for a minute or two, then dust with powdered sugar if you like. Serve warm or at room temperature—they're delicious either way.
 Pin It
 There's something unexpectedly moving about baking something shaped like a tree in the middle of December—it connects you to that quiet, festive feeling without any fuss. My family now requests these every year, and I've started making extra batches to give away, which has somehow become my favorite part of the holiday.
Why These Pastries Are So Magical
The magic lies in the contrast: pastry that shatters between your teeth and chocolate that melts on your tongue, all in one bite. There's no complicated technique, no temperamental dough to wrestle with, just simple ingredients working together. Every time I make them, I'm reminded that sometimes the most impressive desserts are the ones that require the least stress.
Making Them Ahead of Time
If you want to get ahead of your holiday schedule, you can assemble these trees a few hours before baking and keep them in the refrigerator—they'll bake beautifully straight from cold. This trick has saved me countless times when I'm juggling multiple dishes. You can also reheat them gently in a low oven if you've made them ahead; they'll regain their crispness.
Creative Twists and Pairings
Once you master the basic version, you can play around—try swapping Nutella for almond butter and chocolate spread, or dust the finished trees with crushed hazelnuts before baking for an extra crunch. They pair beautifully with hot chocolate, mulled wine, or even a simple cup of coffee.
- Brush the finished, cooled trees with a bit of melted chocolate for extra decadence.
- Sprinkle crushed pistachios or toasted hazelnuts on top of the egg wash before baking for texture and nutty flavor.
- If you're not using powdered sugar, a light drizzle of chocolate icing over the cooled trees adds elegance without being fussy.
 Pin It
 These little Nutella trees have a way of turning an ordinary afternoon into something festive and special. Bake a batch, watch them puff into golden, twisted magic, and enjoy the simple pleasure of knowing you made something this delicious from almost nothing.
Questions & Answers
- → What type of pastry is best for these trees?
Flaky puff pastry sheets work best as they puff beautifully and create a crisp, buttery texture.
- → Can I substitute Nutella with other fillings?
Yes, chocolate-hazelnut spreads or even finely chopped nuts mixed with chocolate can be used for variation.
- → How do I achieve the twist effect on the pastry branches?
Carefully cut horizontal slits on each side of the tree shape, then gently twist each branch outward before baking.
- → Should I use an egg wash before baking?
Brushing the pastry with beaten egg before baking helps achieve a shiny, golden-brown finish.
- → How should these pastries be stored?
Store in an airtight container at room temperature and consume within a day for optimal crispness; they can be reheated to refresh texture.
- → What beverages pair well with these treats?
Hot chocolate, mulled wine, or warm spiced tea complement the flavors perfectly during festive occasions.